Friday, January 13, 2012

5 Tips to Attack the Cold/Flu


You are enjoying a peaceful evening with your family in your suburban home. You begin to notice your husband's constant sniffling, you hand him a tissue and quickly disregard it as "a bit of dust". Then your child starts coughing. "Are you okay, dear?" you inquire. "Fine, Mommy," is Timmy's reply, "Johnny bet me ten cents that I wouldn't lick the classroom doorknob - I showed him!" You are about to tell him he shouldn't be licking doorknobs when you feel a slight tickle in your throat and then you realize - you are being INVADED!!! dun.dun.dun

It's cold/flu season! There is just no way around it. Personally, I got over it just last week & while I kept my Kleenex stockpile up I wondered, "is there any way to escape this?" The short answer is: No, but there are ways to help you when you get invaded.

1. Stay home!! Sure, it's not fun to stay home from book club, but what is worse: missing one night of chit chat that you can barely hear from your headache, or being referred to as "the gal who kept sneezing on things"? Honestly, you got sick because someone couldn't keep their germs at home. Stop the cycle by keeping yours to yourself.

2. Pull out the soap. "Aim for at least four hand washings a day. Other than getting the vaccine, frequent hand washing is the most effective way to protect against the flu," says Thomas Saari, M.D. Hand sanitizer is great in a pinch when you are in a place without running water & soap, but if you have the choice and/or there is visible dirt, choose the soap and water.

3. Turn up the heat. Heat is a speedy way to kill germs. When someone in our family is sick I run our dishwasher on heat dry as an extra precaution to make sure our dishes are really clean. You can also run some children's toys on the top rack of the dishwasher, too. I am usually a cold water person when it comes to washing our clothes, but if we are sick I will run a few loads on hot water.  Don't want to use that much hot water on your family laundry? Consider doing it with just a load of "infected" laundry. While we are on the subject of laundry, a friend of mine (a school teacher) always has her family change their clothes when they come home from school...if you think of it, that is a lot of germs you are putting in the laundry basket and away from the rest of the house.

4.  Wipe it to swipe it. "Viruses can survive up to three days on surfaces and inanimate objects," says Chuck Gerba, a professor of environmental microbiology at the University of Arizona in Tucson. Focus on "Hot Spots" around the house that get touched/used a lot (doorknobs, switches, handles, phones, counters, remotes, etc.) with your favorite disinfecting product that contains alcohol.

5. Sharing is not caring. There is the popular adage "We are a family that shares everything...even our germs".  Be sure that children don't share things like cups, utensils or anything they would put their mouth on. If the patient can have commonly shared items that they can claim as their own(cup, blanket, etc.) & can't be confused with others that can help cut down on the germ spreading quite a bit. One thing my Mom did was to color code our cups - mine was red and didn't get confused with my yucky brothers green cup. It also helps if the patient can have their own space to sleep (space permitting) especially if they share a room with other siblings. Giving them (or you) that space can help keep germs from spreading and give a quieter environment to re-coop in. 

*6* Mother knows best. Hate to admit it, but the three sure things to help you get over that bug: lots of water, SLEEP & chicken noodle soup...my Mom told me that all the time, but for some reason it didn't really sink in until I got older.


Do you have any home remedies? Please share!
Hope you get feeling better soon!!

Photobucket

Friday, January 6, 2012

New Year, New Look!

You may have noticed that things are looking quite a bit different around here...at least we hope you've noticed!!  After using the same layout since starting our blog in September 2010, we decided it was time for a new look.  The pics from our awesome photo shoot with Brandi Lyn Photography provided our color inspiration, and Michelle spearheaded our remodel.  We love our new look and hope you will enjoy our cleaner, fresher site.

We are also thrilled to unveil our new signatures!!  The most common suggestion we've received over the last sixteen months of blogging is that you want an easier way to tell who wrote which post.  With that in mind, we now have two signatures!

If Michelle writes a post, she will use this signature: 
Photobucket
See how Michelle's name is first?
This is what you'll see when I write the post:
Photobucket
And now my name is first!
 There may be some additional tweaking to the site in the upcoming weeks, but this is pretty much how things are going to look around here from here on out.

What do you think of She Said's new look?

Photobucket

Tuesday, January 3, 2012

Post-Holiday Crafting: What to Do with Your Christmas Cards

Happy 2012, everybody!!

We hope your holidays were joyful and filled with family, friends, fun, and yummy food.  Now that the new year has started, you're probably in the process of putting away your Christmas decorations and trying to answer that age-old question:

What should I do with all of these Christmas cards?

Christmas cards are so much fun to send and receive, and if you're like me, you feel bad about just throwing them out when the holiday season ends.  I've found several different ideas online for reusing Christmas cards, but this one was my favorite.  Even better, it utilized my Silhouette SD Craft Cutter!  If you don't have a Silhouette, don't fret; you can do this with a pair of scissors, too. :)  With just a little bit of time, your Christmas cards can find new life as Christmas gift tags!

All you will need for this project are Christmas cards, scissors/craft cutter, and a gift tag template (or you can just eyeball it if you're really talented!).


I would not recommend using photo cards for this project -- it would be a little creepy to have somebody's face smiling up at you from a gift. (Unless it's John Lennon.  Then that would just be cool.)

Cut the fronts off of your cards -- you'll want to make sure the back side of the picture is blank.
Read the heartfelt sentiment on the inside of the card and then file it or trash it or whatever.

If you have a Silhouette, you can download gift tag templates to use, or you can design your own.
If you don't have a Silhouette, I'm sure you can find free templates online; you could also trace an existing gift tag, draw your own, or just freehand it.

Once you have your card fronts and your template, cut cut cut!  I was able to get 20 gift tags from four regular cards and two money-holder cards.


Save your tags for next Christmas, when you will amaze everyone with your creative, ecofriendly way for addressing your gifts.

What do you normally do with Christmas cards?

Photobucket

Monday, December 19, 2011

So This Is Christmas

So this is Christmas...

...and what have you done...
 
...another year over...

...and a new one just begun...
 
...and so Happy Christmas...

...we hope you have fun...

...the near and the dear ones...


...the old and the young...

...a very MERRY CHRISTMAS
and a HAPPY NEW YEAR!!!

**Lyrics from "Happy Xmas (War Is Over)" by the incomparable John Lennon

Photobucket

Friday, December 16, 2011

Christmas Crafting -- Easy Crocheted Dishcloth

Both Michelle and I learned how to crochet a long time ago, but over the last few years, I learned that I LOVE to crochet.  I really do.  I may not be quite as skilled as Kara, but I have a lot of fun making things for the people I love (and for myself, too!).  This year, I wanted something cute and quick that I could give to some people on my list, and I came up with this:


I looked at some other crochet dishcloth patterns and couldn't find one that was quite what I wanted, so I came up with my own!  If you know how to crochet, then you will have no problem with this pattern.  It's easy and pretty quick, too; I think the first one took me about an hour and the rest have gotten progressively quicker to do.

Here's what you're going to need:


Yarn, a crochet hook, and some time.

I used a size G crochet hook and this 100% cotton, worsted-weight yarn called "Yuletide" from Peaches & Creme.  I bought it at Walmart for less than $2 a skein and it is wonderful to use!  You can get about 1-1/2 dishcloths from one skein.

To make this dishcloth, you'll need to know how to crochet a V-stitch.  This is one of my favorite stitches to use, which is why I used it to create the pattern.  If you don't know how to V-stitch, you can find an explanation here.  These instructions only show how to make one row of V-stitches; when you work the next row, instead of inserting your hook into a stitch, you will put your hook underneath that middle Ch-1 and pull your yarn through the empty space in the middle of each V.

Please note: I have exactly zero experience writing crochet patterns, so please excuse my lack of professionalism. :)  If you have any questions at all, please email!!!!

Row 1: Chain 40.  In 5th chain from hook, DC, ch 1, DC (1 "V" made).  *Skip next 2 chains.  V-stitch in next chain.  Repeat from * until 12 V's have been made.  Skip 1 ch and DC in last chain.  Ch 3 and turn.

Row 2: V-stitch in each ch-1 space across until 12 V's have been made.  DC in top of turning chain from previous row.  Ch 3 and turn.

Can you see the little V's?
Repeat until desired size (I do 17 rows) and fasten off.

Ta-daaaa!!  You now have a cute dishcloth to give to somebody else or keep for yourself!

Who doesn't love a handmade gift?

Bring some Christmas cheer to your chores!

Download your "We Wash You a Merry Christmas" gift tag HERE

If you don't know how to crochet but want to learn how, I highly recommend Debbie Stoller's book  The Happy Hooker.  (Get your minds out of the gutter!  She's talking about crochet hooks!!)

Happy Crocheting!!

Photobucket 

Saturday, December 10, 2011

A Sweet lil' Gift

'Tis the season for gift giving. I absolutely love it. The thrill of the hunt to find the perfect gift for everyone on my list. One of the ways I simplify in my gift giving is to make a "bulk" gift for my gal-pals. That way I can put equal effort into each one of my gifts for them. I have other friends that do this too and both the givers & recievers love it! Try it this year - you will do it every year following it!

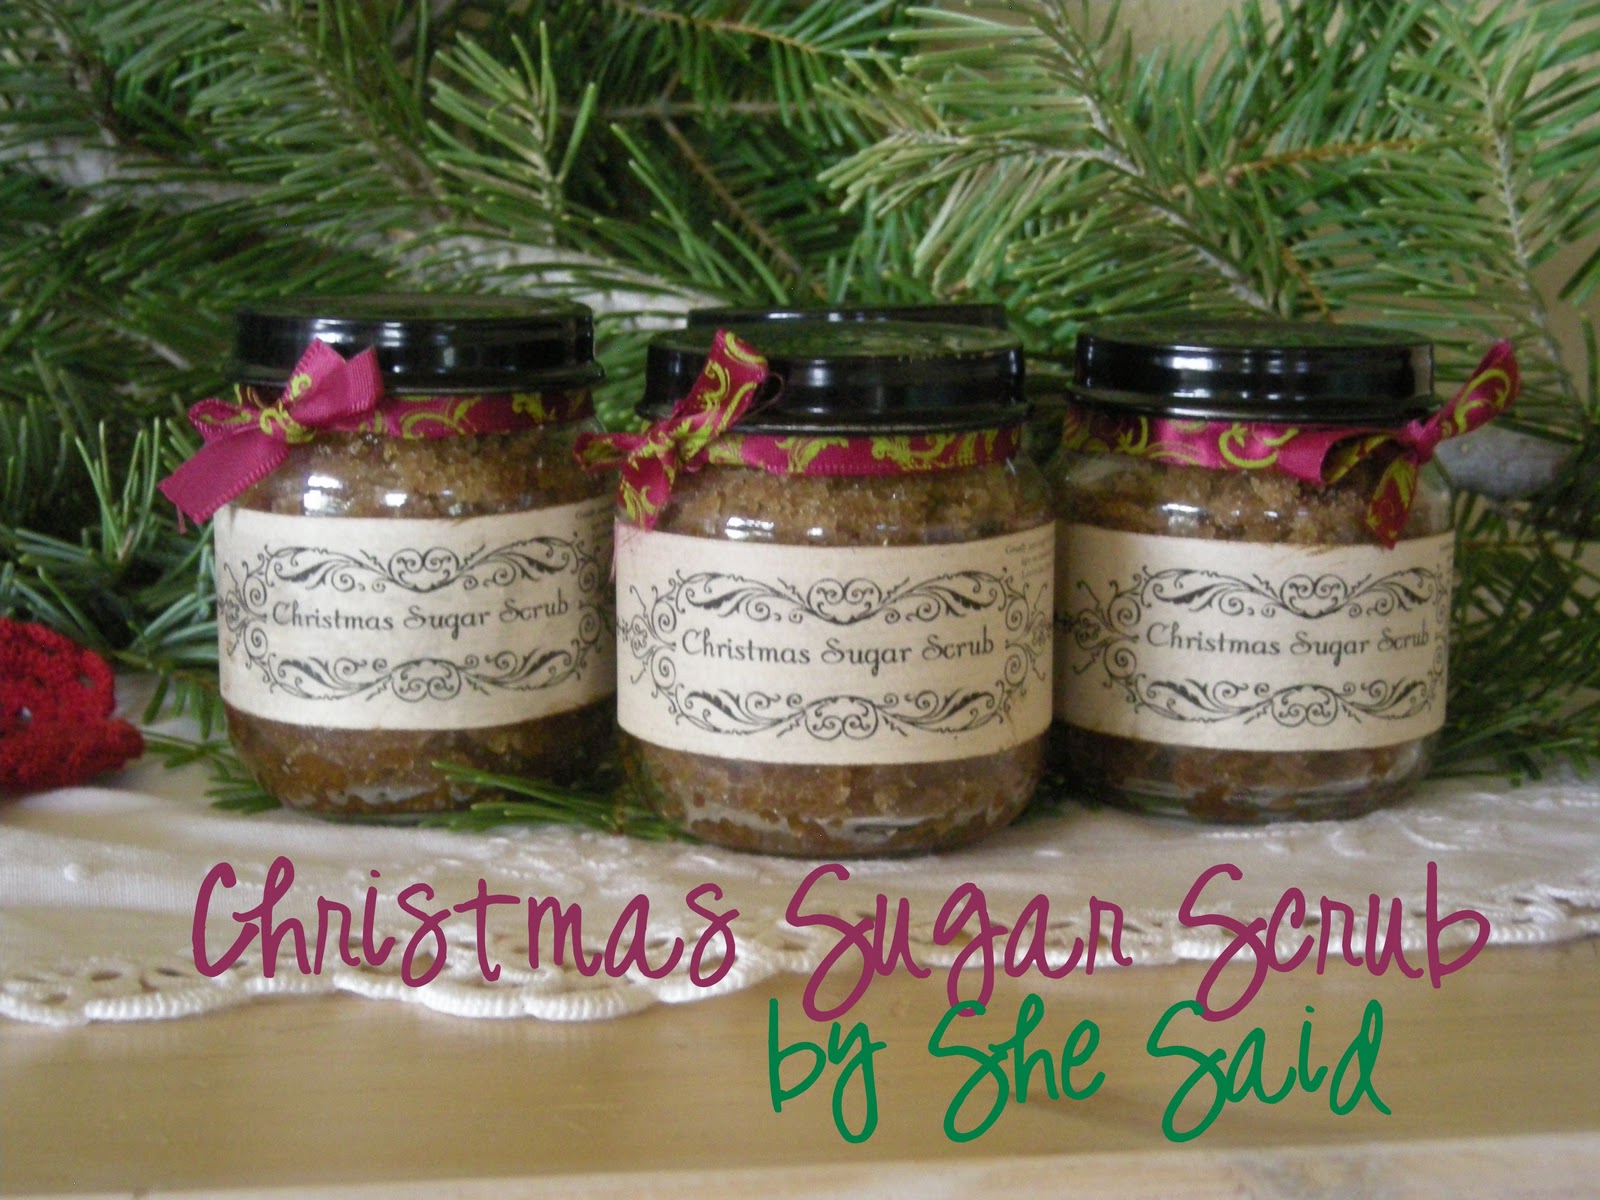
 This year I am doing sugar scrubs. They are simple & luxurious and my favorite part about them is that there are so many sugar scrub recipies out there you can hand them out all year long (spicy for Christmas, orangcicle for summer, etc).
You can go to WalMart and get cute jars (be sure that they can seal tightly) or if you happen to have some baby food jars lying around...perfect size!! I just spray painted the lids a glossy black (or glittery red, there are so many choices)


Mix up your desired sugar scrub recipe. Tip Junkie has a great list of  14 Easy Homemade Sugar Scrubs to choose from. I knew that I wanted a sweet spicy scent. After reading through some recipes I created one of my own!
Tip: Be sure to mix your sugars together first to get all the lumps out before adding the oils.

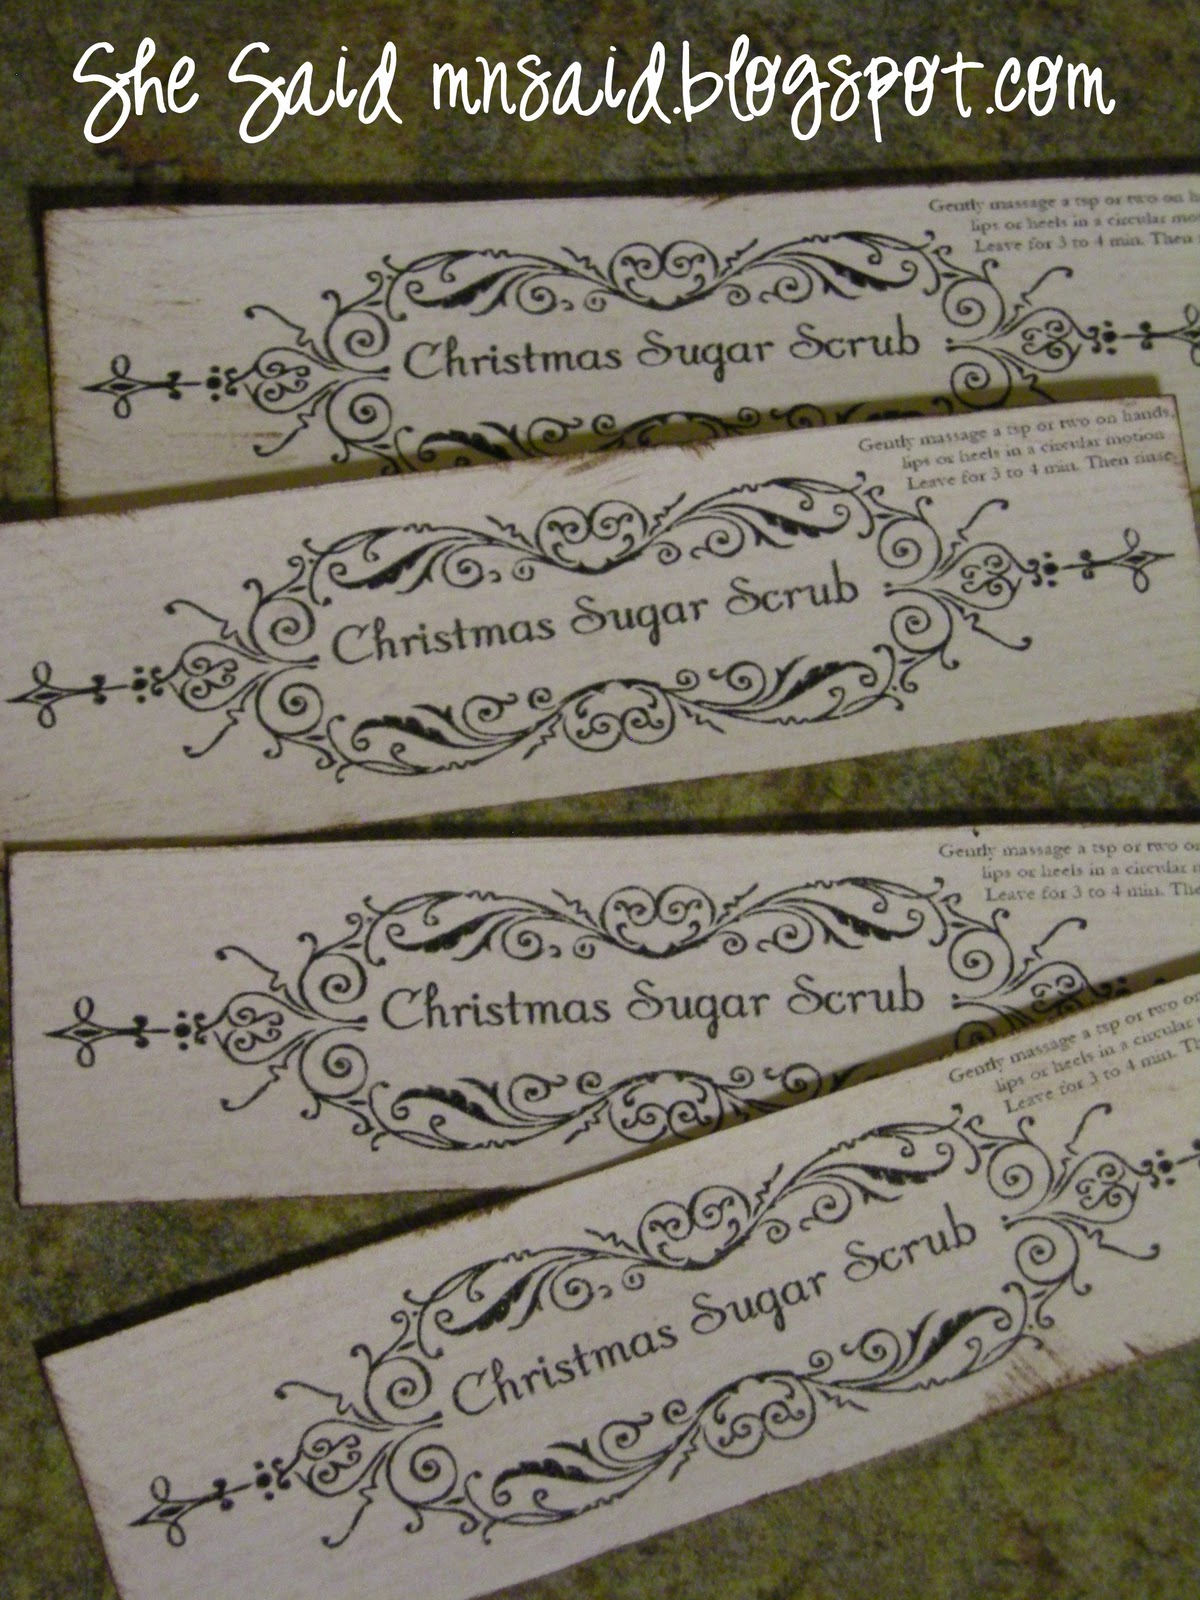
I made some little labels for my jars and affixed them to the jars with craft bond (think spray glue).
*sorry that it's doing two pages. I've tried numerous things and it just won't change. The bottom three labels are sized larger than the top*

Then tied some ribbon around the top and TaDA! An easy - cute - sweet - gift all ready to hand out to some deserved friends. I think it's extra sweet to tie little silver (aka: baby spoons) to the jar, instead of ribbon some cute twine....the possibilities are endless really.

Have fun and Happy Gift Giving this holiday season!!
Link Party
Photobucket

Saturday, December 3, 2011

Holiday Pinspiration

Haul out the holly!!!  I have had this on my Must Craft Soon pin board for awhile and tis the season to do it.
I followed this great tutorial by Eddie Ross once I saw his Joan Crawford "no wire hangers" reference I knew that we would be great friends!


You will need:
a Wire Hanger
80 or so Ornaments (of varying sizes)
Hot glue
A good movie

I was able to accumulate all of my ornaments from yard sales. Last weekened I went to a $2 bag sale for my local American Legion. My friends & I were a bit wary of all the old-people stuff, but once I saw these AWESOME retro spiky ornaments I was all over it. I scooped those two up (the only two that were there) along with some yellow & teal colored ornaments and took them home to my two boxes of green ones that I got from another yard sale.

The important thing is to have different sizes of balls. If you look close at this pic you can see the gaps. If I hadn't been so anxious to get this done (and plus it was midnight) I would/should have gotten another pack of smaller bulbs to fillin those spots, but if you are like me and just want to get it done you don't notice the gaps unless you point them out ....like I did.

Hanging it up was also an experience, be sure that you have a long ribbon, wire or (like me) some paperclips to unravel and use to reach your hanging spot. The bulbs make this wreat bulky and it won't lay flat against the wall. One tutorial that I read directed you to lay the blubs so it had a flat back - I didn't do that. By the time I read that I had already made the wreath and was looking up how to hang it up.
I unraveled some paper clips to make an "extended hook" hooked them to the hanger top & then to the nail. It worked and it is all covered up by my bow (if you ask with a pretty please I will teach you how to make those too :)

The tutorial is easy and simple to follow and I had the craft done by the end of the night! (I love those kind of crafts don't you?)

Link Party
Photobucket
Related Posts Plugin for WordPress, Blogger...
 

Template by Best Web Hosting